Car Price Prediction
ML: From Data scraping to Deployment Link to heading
Read the details here: https://medium.com/@chidubemndukwe/ml-from-data-scraping-to-deployment-fa7ddc5fab5c
watch the demo here: https://github.com/Duks31/car_price-prediction/blob/main/README.md
Project Workflow Link to heading
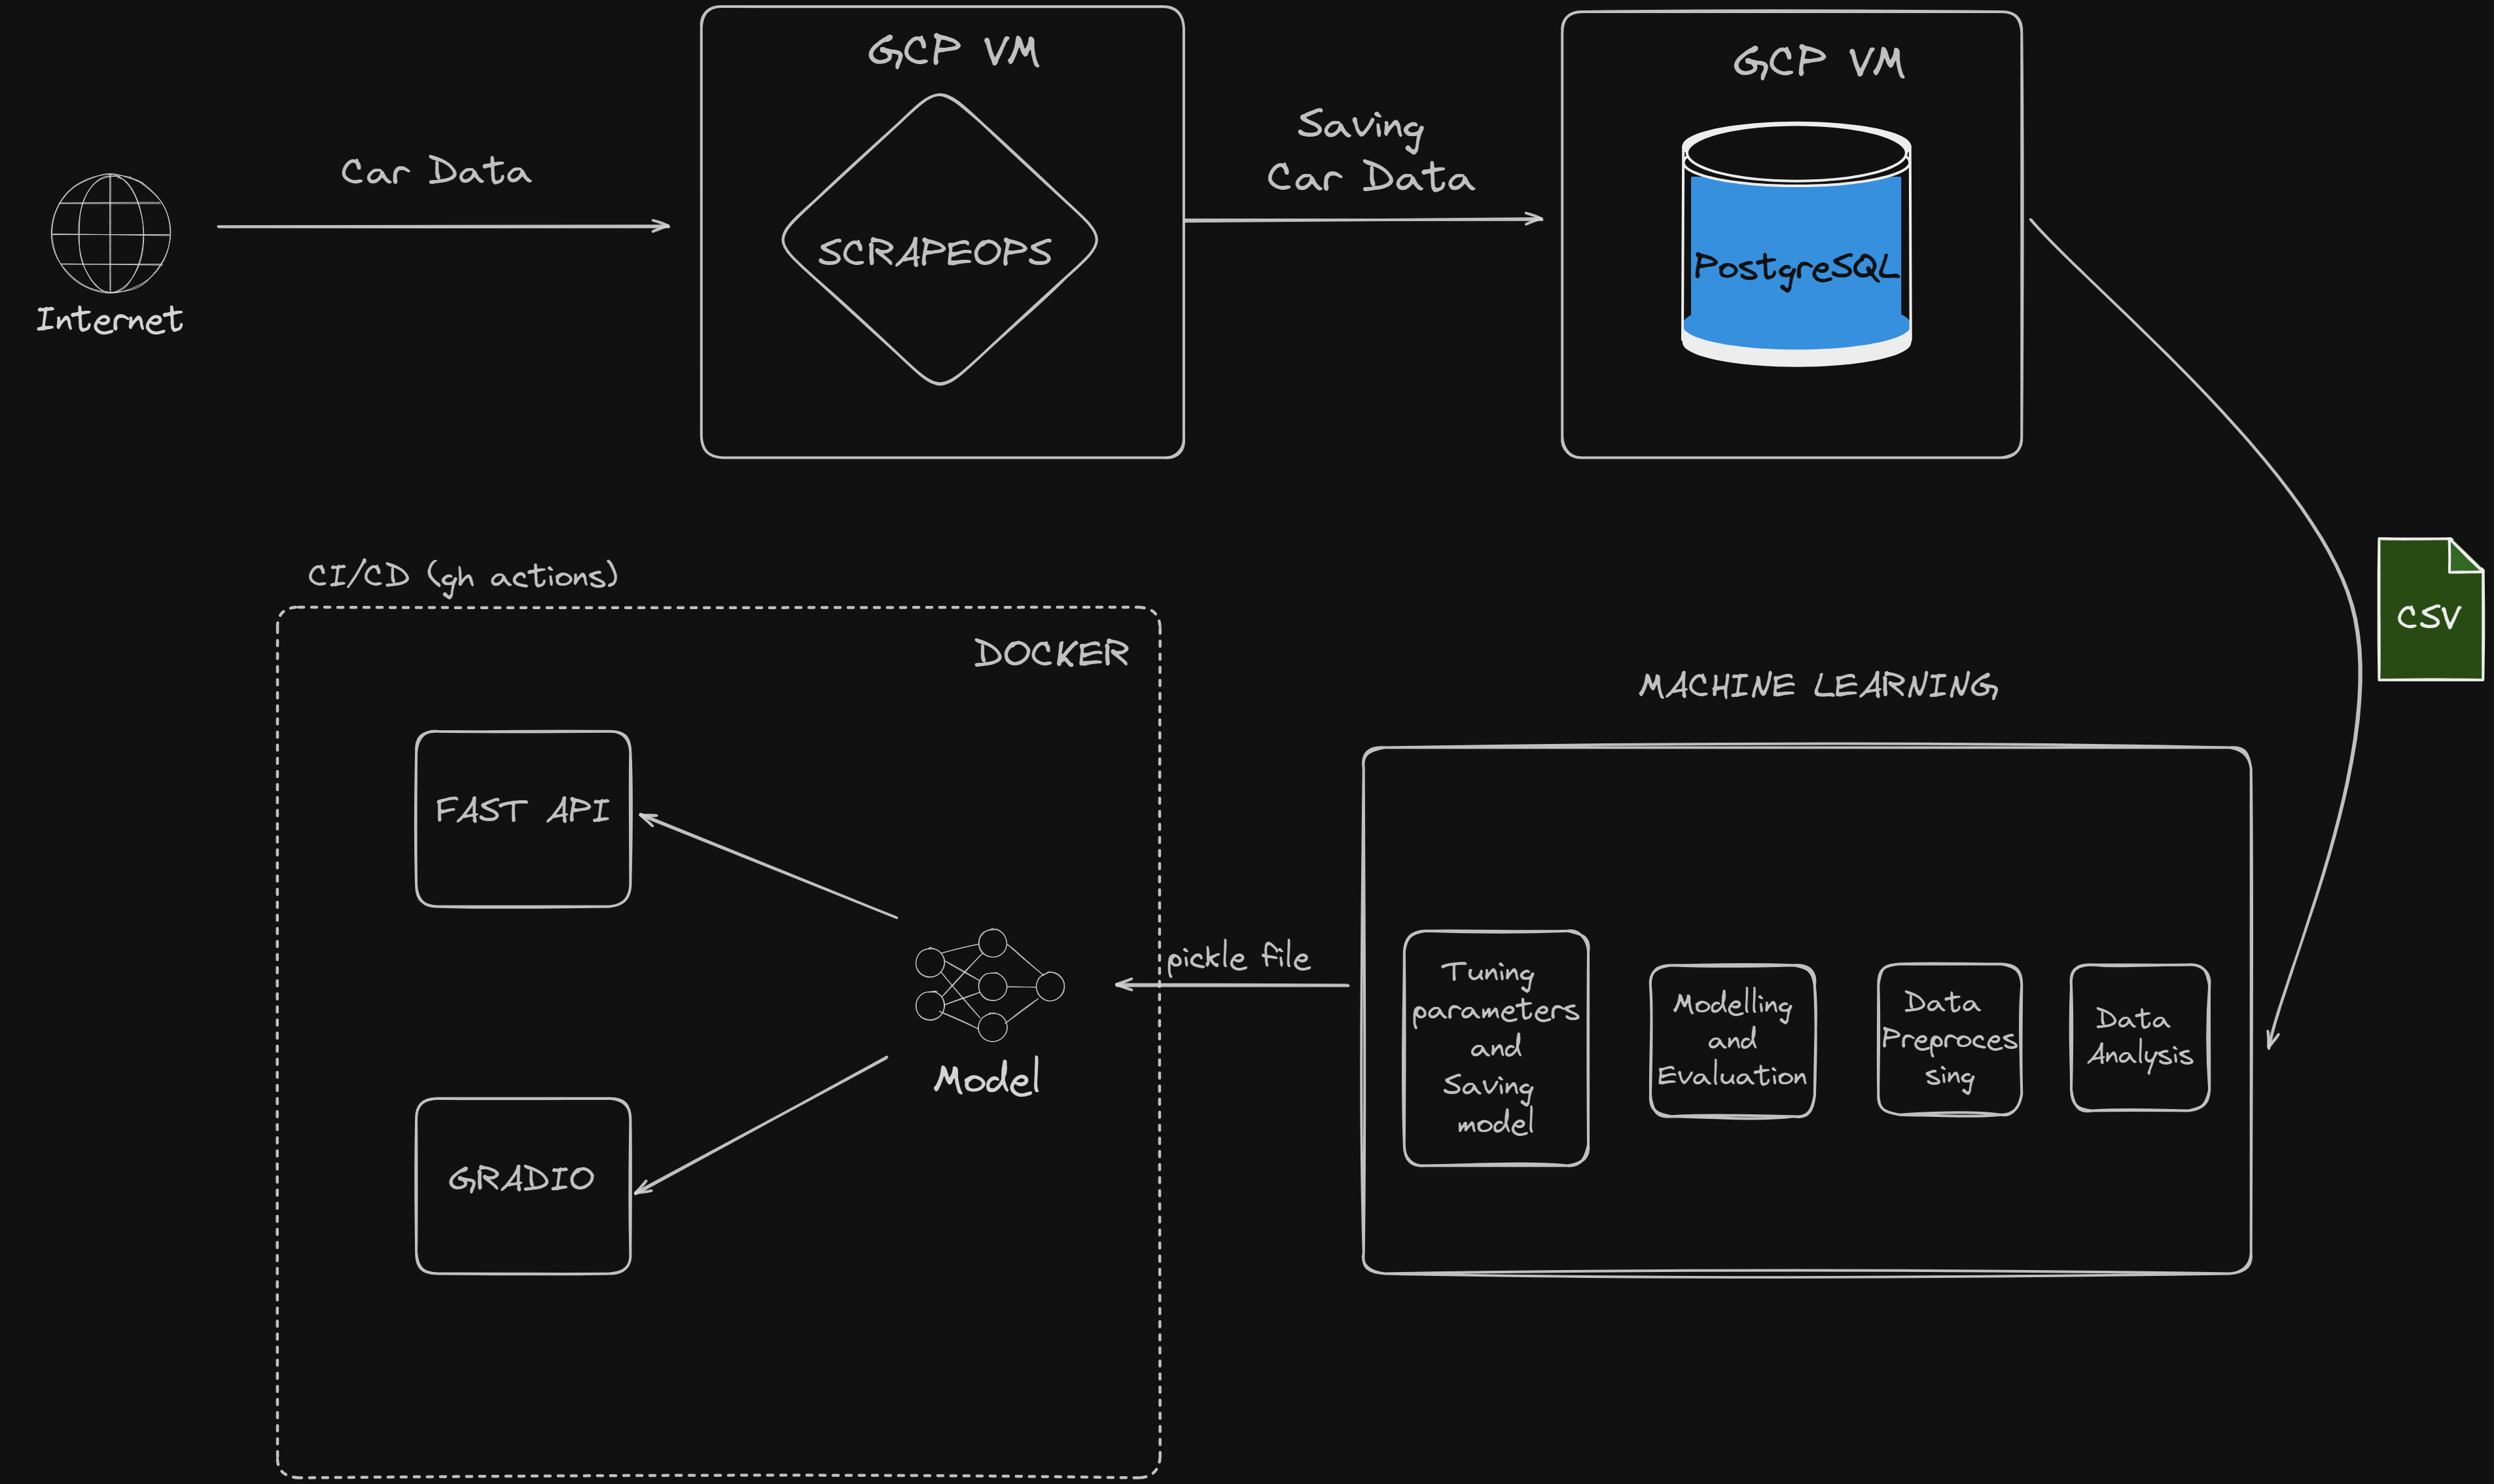
Project Overview Link to heading
- Data Scraping
Data Scraping workflow Link to heading

* Scrapy: Developed a web scraper to extract car data, saved it as CSV.
* PostgreSQL: Hosted the scraped data on a local PostgreSQL database.
* GCP VM Instance: Deployed the scraper using ScrapeOps, scheduled to run daily at midnight.
* Data Curation: Stopped the scraper upon reaching a sufficient number of entries.
Machine Learning
- Imported data from PostgreSQL to local storage.
- Performed data analysis and preprocessing.
- Built and evaluated the machine learning model.
- Fine-tuned the model and saved it as a pickle file.
FastAPI
Created an API for the model to process new data and make predictions. Hosted the API on port 8000.
Gradio
- Designed a simple UI for visualization purposes.
Docker
- Dockerized the API and Gradio app into a single container.
- Pushed the container to Docker Hub.
GitHub Actions
- Configured CI/CD to build and push Docker images on PR to the main branch.
Repo Structure
car_pred_project
│   .dockerignore
│   .env
│   .gitignore
│   compose.yaml
│   Dockerfile
│   poetry.lock
│   pyproject.toml
│   README.md
│   requirements.txt
│   supervisord.conf
│
├───.github
│   └───workflows
│           docker-image.yml
│
├───car_pred
│   │   gradio_app.py
│   │   main.py
│   │   model.py
│   │   README.Docker.md
│   │   __init__.py
│   │
│   ├───data
│   │       car_data.csv
│   │
│   ├───model
│   │       car_prediction_model.pickle
│   │
│   ├───notebooks
│   │       import_data.ipynb
│   │       main.ipynb
│
└───tests
        __init__.py
Getting Started Link to heading
Prerequisites Link to heading
- Docker
- Python
- PostgreSQL
- Poetry
💻 Local Development Link to heading
git clone https://github.com/Duks31/car_price-prediction
cd car_price-prediction
poetry install
Fast API Link to heading
uvicorn car_pred.main:app --reload
This will start the FastAPI server on http://localhost:8000/
Gradio Link to heading
python car_pred/gradio_app.py
This will start the FastAPI server on http://localhost:7860/
🐋 Docker compose Link to heading
Windows Link to heading
git clone https://github.com/Duks31/car_price-prediction
mkdir car_pred_project
cd car_pred_project
curl -o docker-compose.yml https://raw.githubusercontent.com/Duks31/car_price-prediction/main/compose.yaml
docker-compose up --build
Linux/macOS Link to heading
git clone https://github.com/Duks31/car_price-prediction
cd car_price-prediction
wget -O docker-compose.yml https://raw.githubusercontent.com/Duks31/car_price-prediction/main/compose.yaml
docker-compose up --build
CI/CD with github actions Link to heading
The GitHub Actions workflow is configured to build and push the Docker image to Docker Hub whenever a pull request is made to the main branch i.e. an update to the model.
The workflow file is located at .github/workflows/docker-image.yml.
Contributing Link to heading
The projcet and model is definitely not perfect. Pull requests are welcome. For major changes.
License Link to heading
This project is licensed under the MIT License. See the LICENSE file for more details.